Steps in this chapter (5)
Where an owner enters the firm's own keys for payments, SMS, email, AI and BookTrove; API keys and webhooks; and calendar links.
Every outside service uses the firm's own account and keys, entered by an owner or practice administrator in Integrations. Each key is kept encrypted, shown afterwards only by its last four characters, and entering one asks for a fresh code from your authenticator app. Appendix F lists the steps in each provider's dashboard.
28.1 The firm's connections
Why
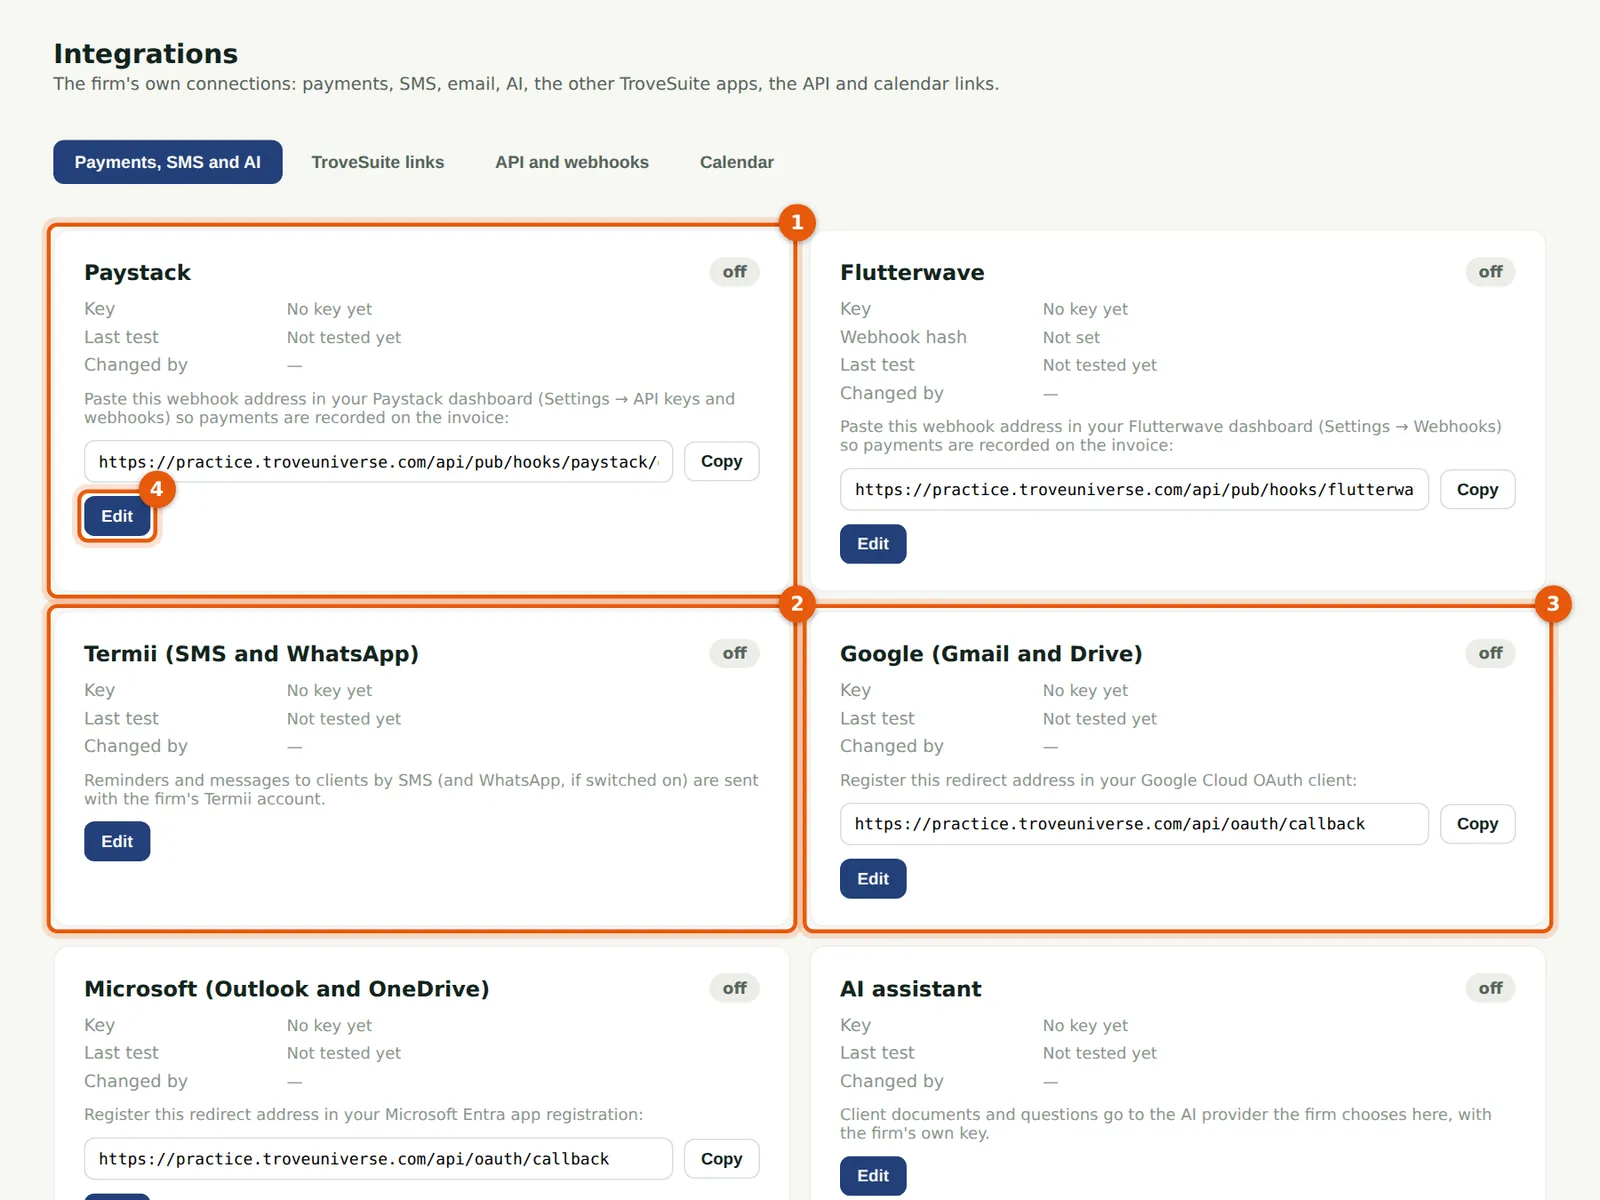
Each card shows whether the connection is on, its key and its last test: Paystack (1) and Flutterwave for payments, Termii (2) for SMS and WhatsApp, Google (3) and Microsoft for email and files, the AI assistant and BookTrove. The webhook and redirect addresses to paste in each provider's dashboard are ready to copy. Edit (4) enters the keys.
Who
Owner or practice administrator; partners see what is connected.
What to do
- Choose Integrations in the menu.
- Choose Edit on a card; after saving, choose Test.
28.2 Enter the Paystack keys
Why
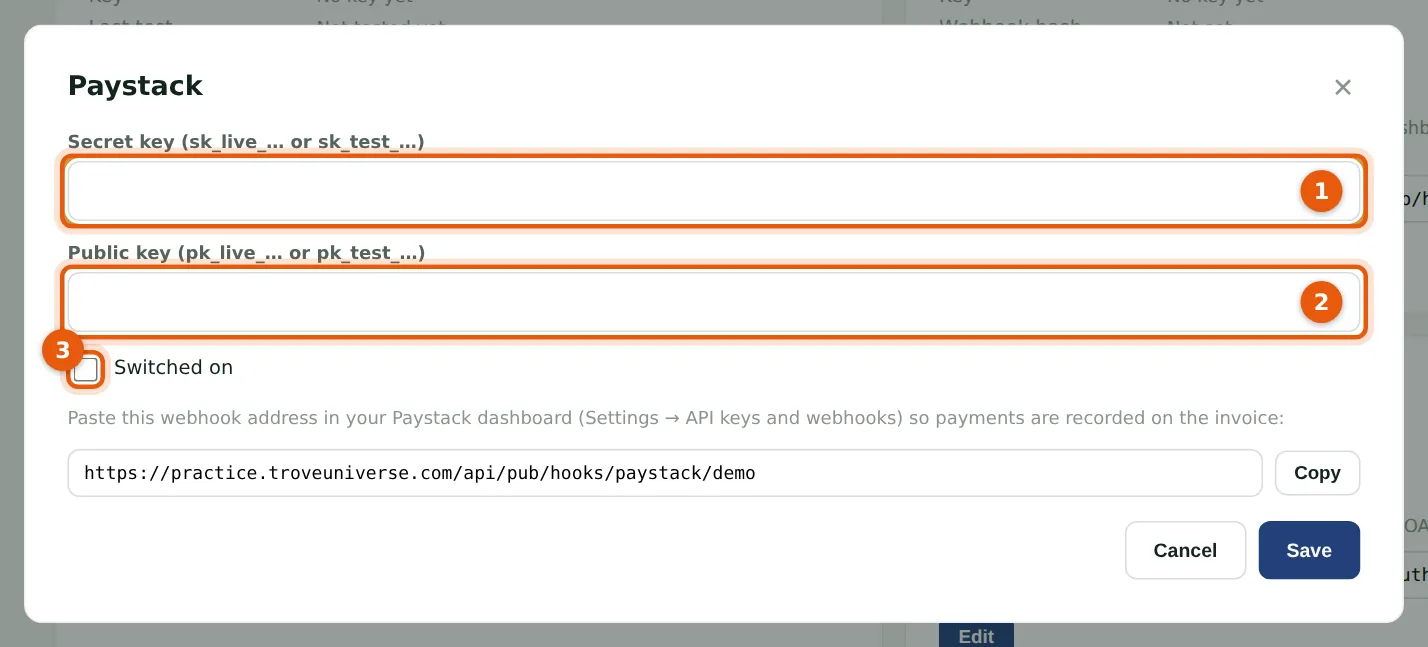
Paste the secret key (1) from Paystack's dashboard (start with the test key), and the public key (2); tick Switched on (3) and save with your authenticator code. Copy the webhook address shown into Paystack, choose Test, then choose Paystack in Billing → Settings. Flutterwave also needs the secret hash you set in its webhook settings.
Who
Owner or practice administrator.
What to do
- Choose Edit on Paystack.
- Paste the keys, tick Switched on and choose Save.
28.3 Fee notes to the firm's BookTrove
Why
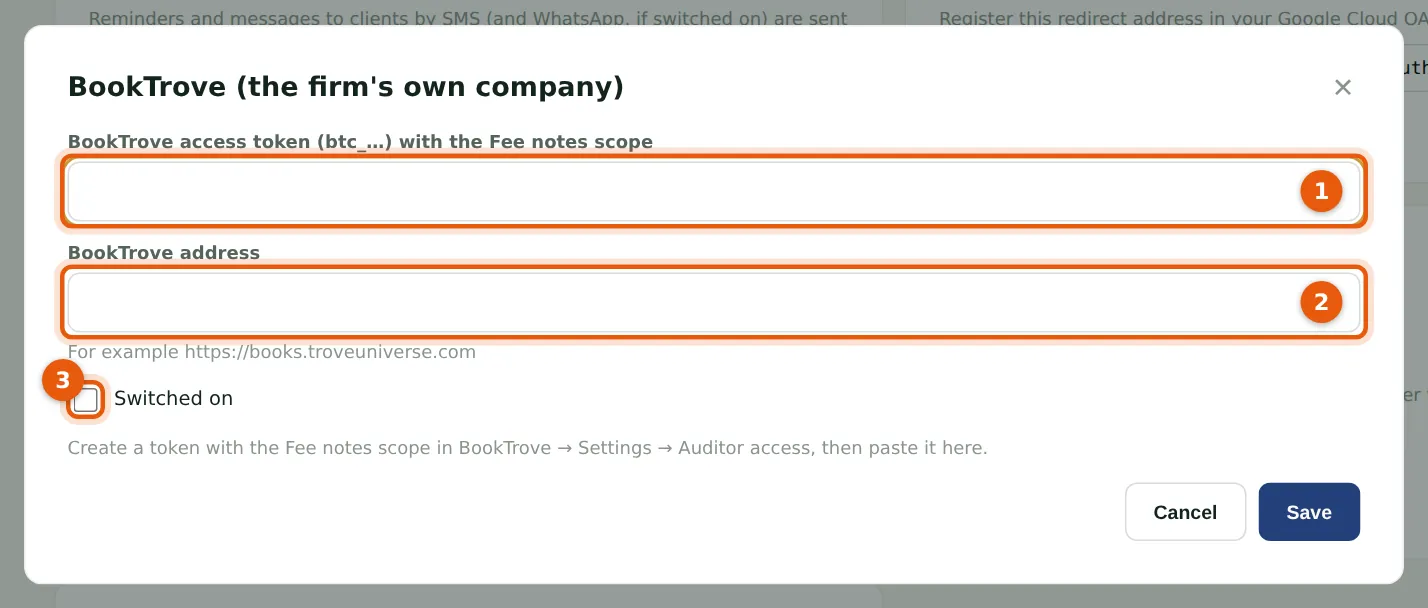
Issued invoices and credit notes can go to the firm's own BookTrove company as fee notes. Paste the BookTrove access token with the Fee notes scope (1) and the BookTrove address (2), switch on (3), save and test, then tick the setting in Billing → Settings. In BookTrove, Fee notes lists them; Create draft makes a sales invoice to check and post.
Who
Owner or practice administrator.
What to do
- In BookTrove, create the access token (Appendix F).
- Choose Edit on BookTrove, paste it, tick Switched on and choose Save.
28.4 API keys and webhooks
Why
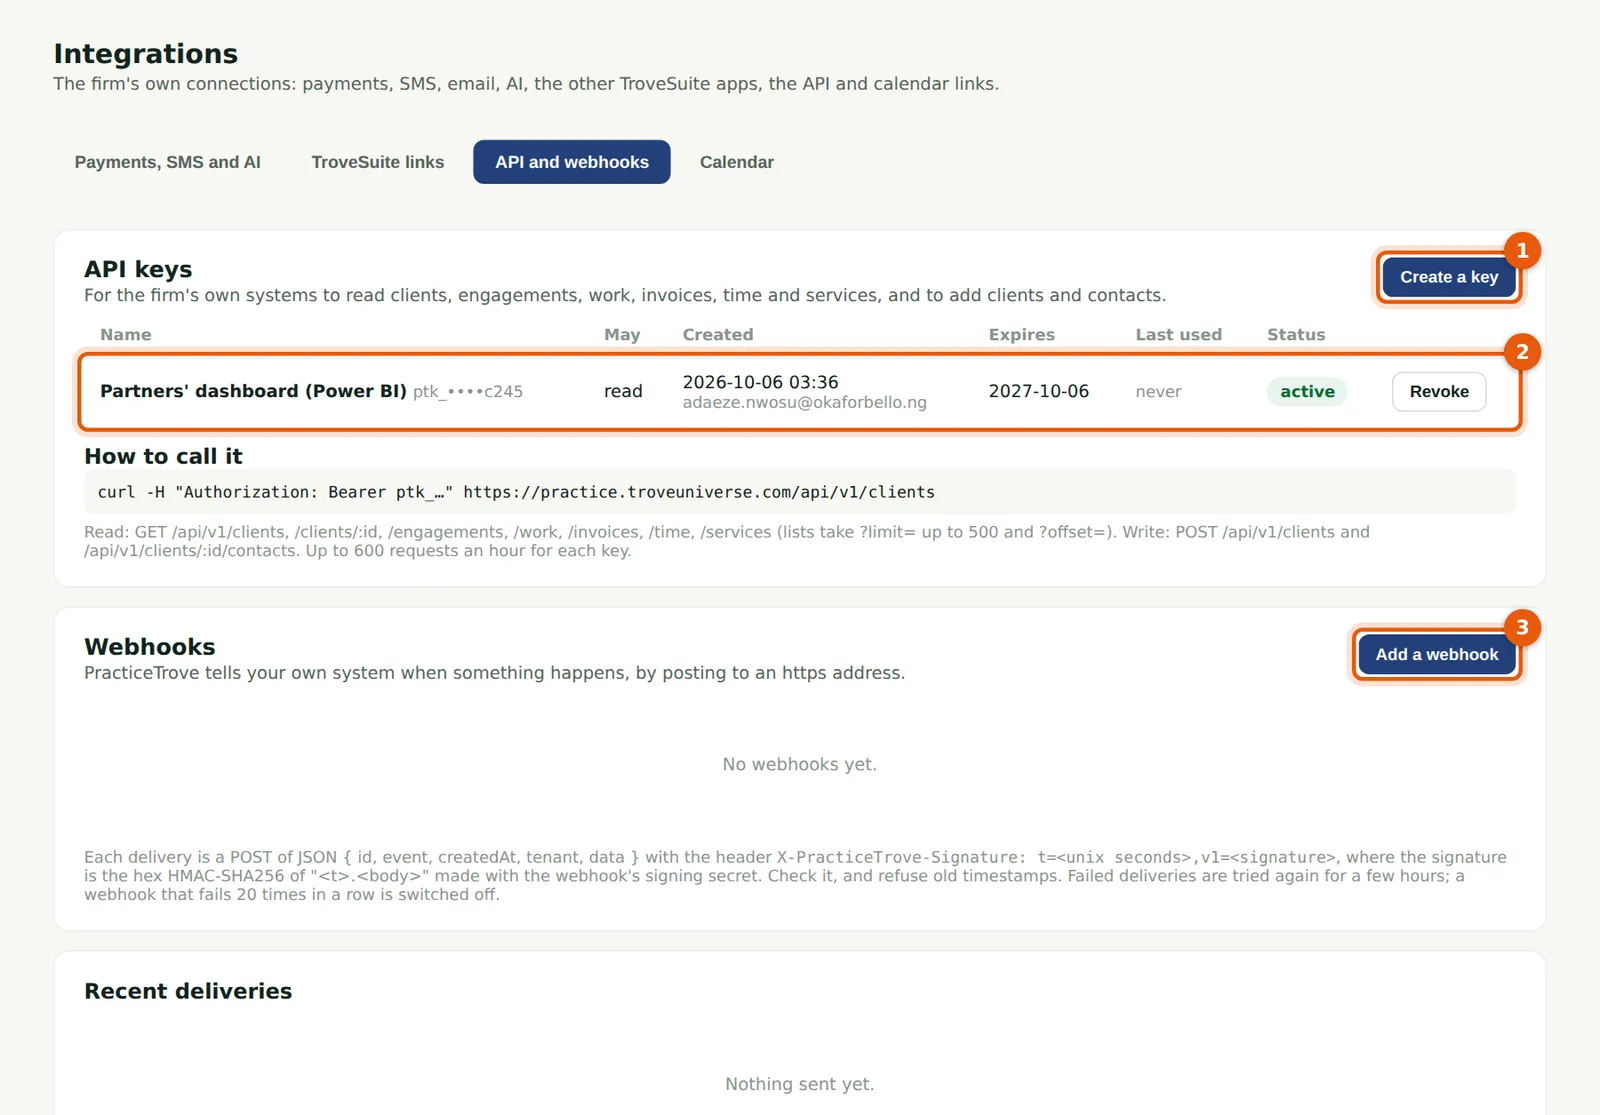
Create a key (1) for the firm's own systems, such as a dashboard in Power BI (2). It has scopes and an expiry, is shown once, and allows 600 requests an hour. A webhook (3) posts events, such as an invoice paid, to an https address, signed in the X-PracticeTrove-Signature header with the webhook's secret. One that fails 20 times running is switched off.
Who
Owner or practice administrator.
What to do
- Choose API and webhooks, then Create a key or Add a webhook.
- Copy the key or secret when it is shown: it is not shown again.
28.5 Deadlines in your calendar
Why
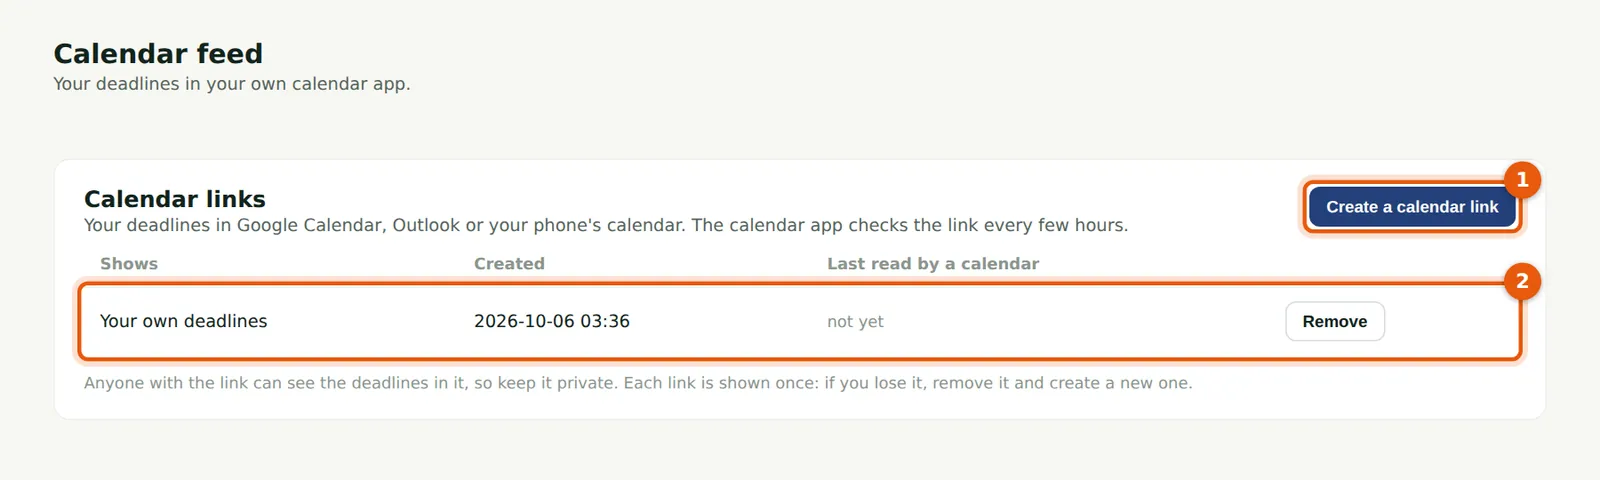
A calendar link puts your deadlines in Google Calendar, Outlook or your phone's calendar: your own (2), or the firm's for managers and above. Create a calendar link (1); it is shown once, so copy it into the calendar app straight away and keep it private. Remove stops it.
Who
Everyone.
What to do
- Choose Calendar feed (Integrations → Calendar for owners), then Create a calendar link.
- Copy the link into your calendar app's Add calendar from URL.