Steps in this chapter (12)
Ask the client for documents with a template, discuss them in comments, let the client assign and bulk-upload, check what the malware checks hold, and accept what the client sends.
Document requests (the 'prepared by client' list) go to the client portal. The client's portal administrator assigns them to colleagues; people on both sides comment on each request with @mentions; the client uploads files one by one or as a ZIP, which is unpacked on the server. The team accepts each request or sends it back with comments.
Every file is checked before it is stored (chapter 3). In the illustration the CFO uploads a ZIP for the new preform line on 11 February 2026: a disguised program in it is refused, and a Word memo with a macro is held until the firm administrator releases it.
Use cases
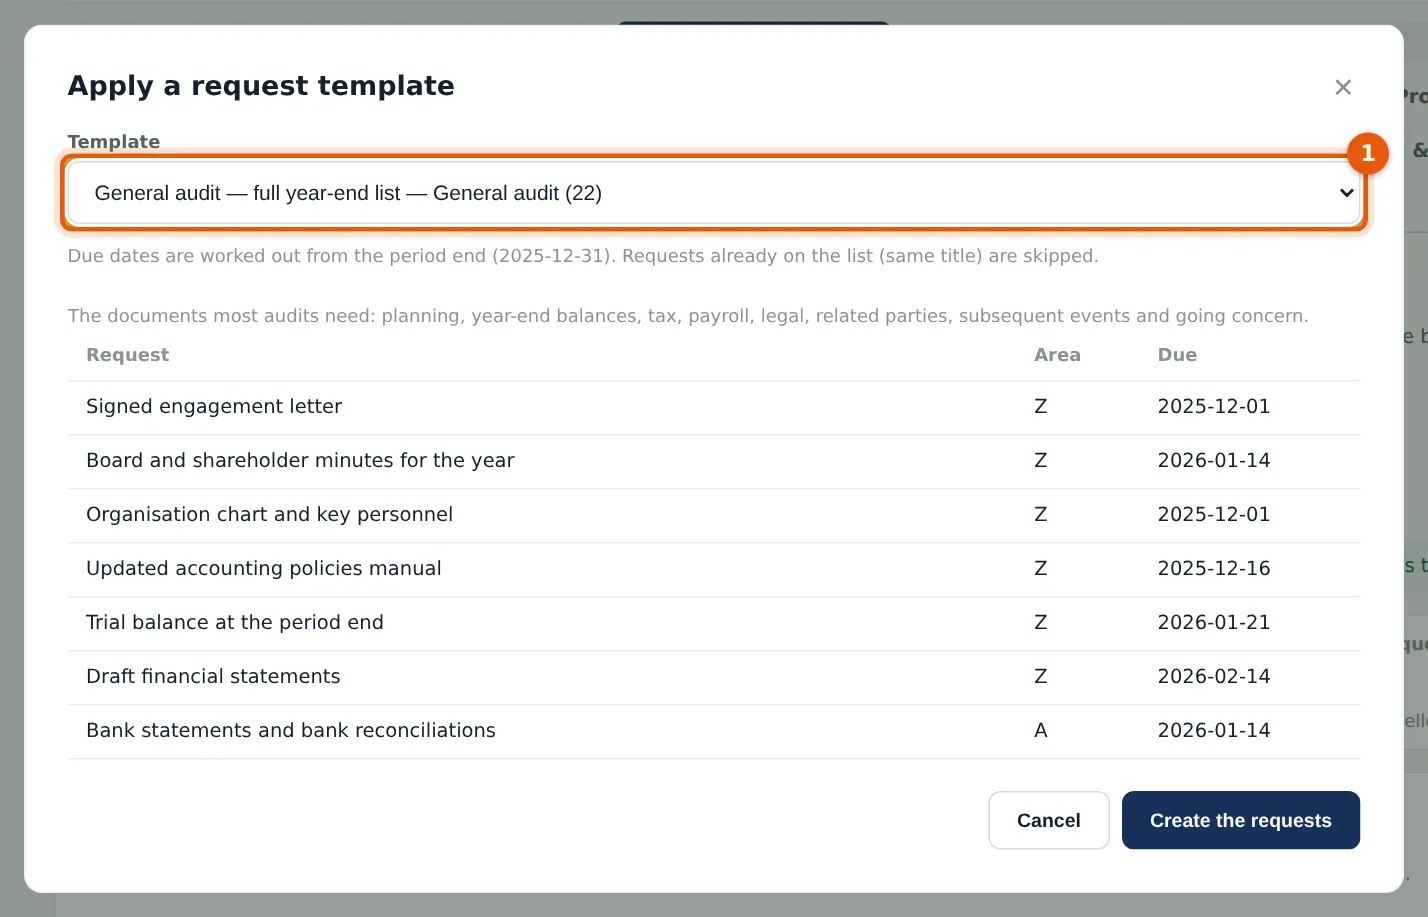
- Use case — The year-end list for a new client. Apply a request template by industry (step 11.1): due dates are worked out from the period end.
- Use case — The client's accountant should answer some requests. The client's portal administrator assigns them in the portal (step 11.5).
- Use case — A file held by the malware checks. A firm administrator checks it and releases or removes it (steps 11.9 and 11.10); until then nobody can open it.
- Use case — The client keeps its books in BookTrove. Send the requests to BookTrove instead and pull the answers and files back (chapter 15).
11.1 Apply a request template
Why
Built-in templates by industry (general, SMEs, banks, insurance, oil and gas, NGOs, public sector, reviews) and the firm's own templates create the usual requests in one step, with due dates worked out from the period end. Requests already on the list are skipped.
Who
Manager or senior.
What to do
- Open Client requests & time and choose Apply a template.
- Choose the template (1), check the preview and choose Create the requests.
11.2 Ask for a document
Why
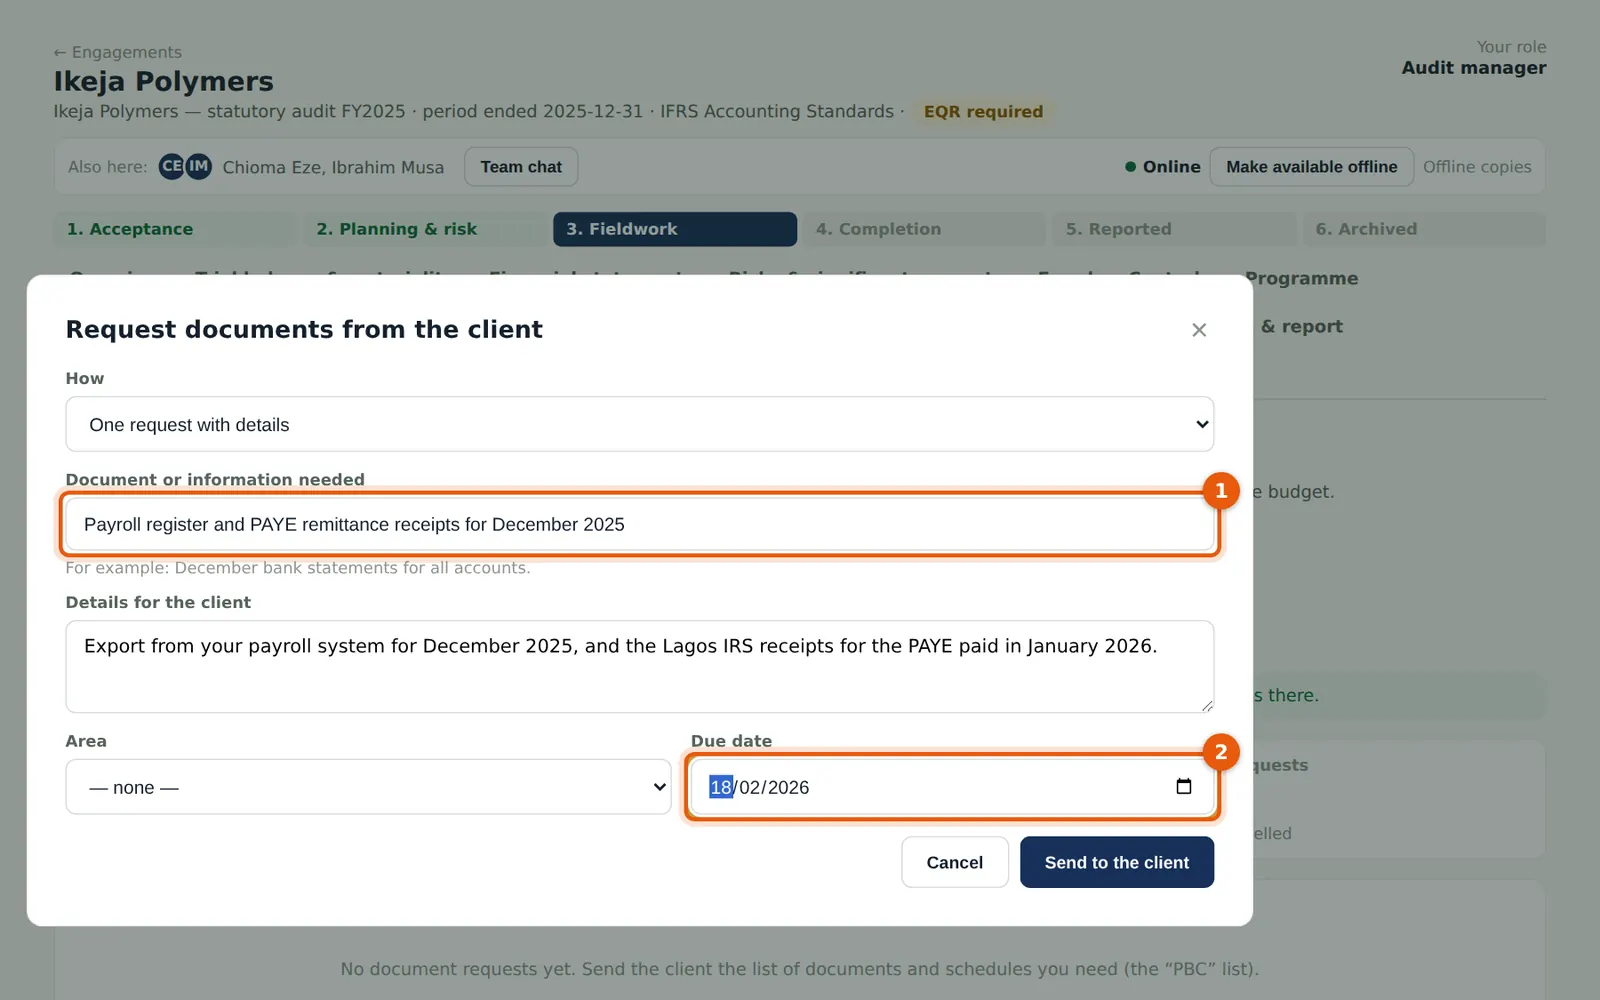
Add requests of your own for anything the template does not cover.
Who
Manager or senior.
What to do
- Choose Request documents.
- Describe the document (1), add details for the client and a due date (2), and choose Send to the client. Several can be sent at once.
11.3 Requests waiting for the client
Why
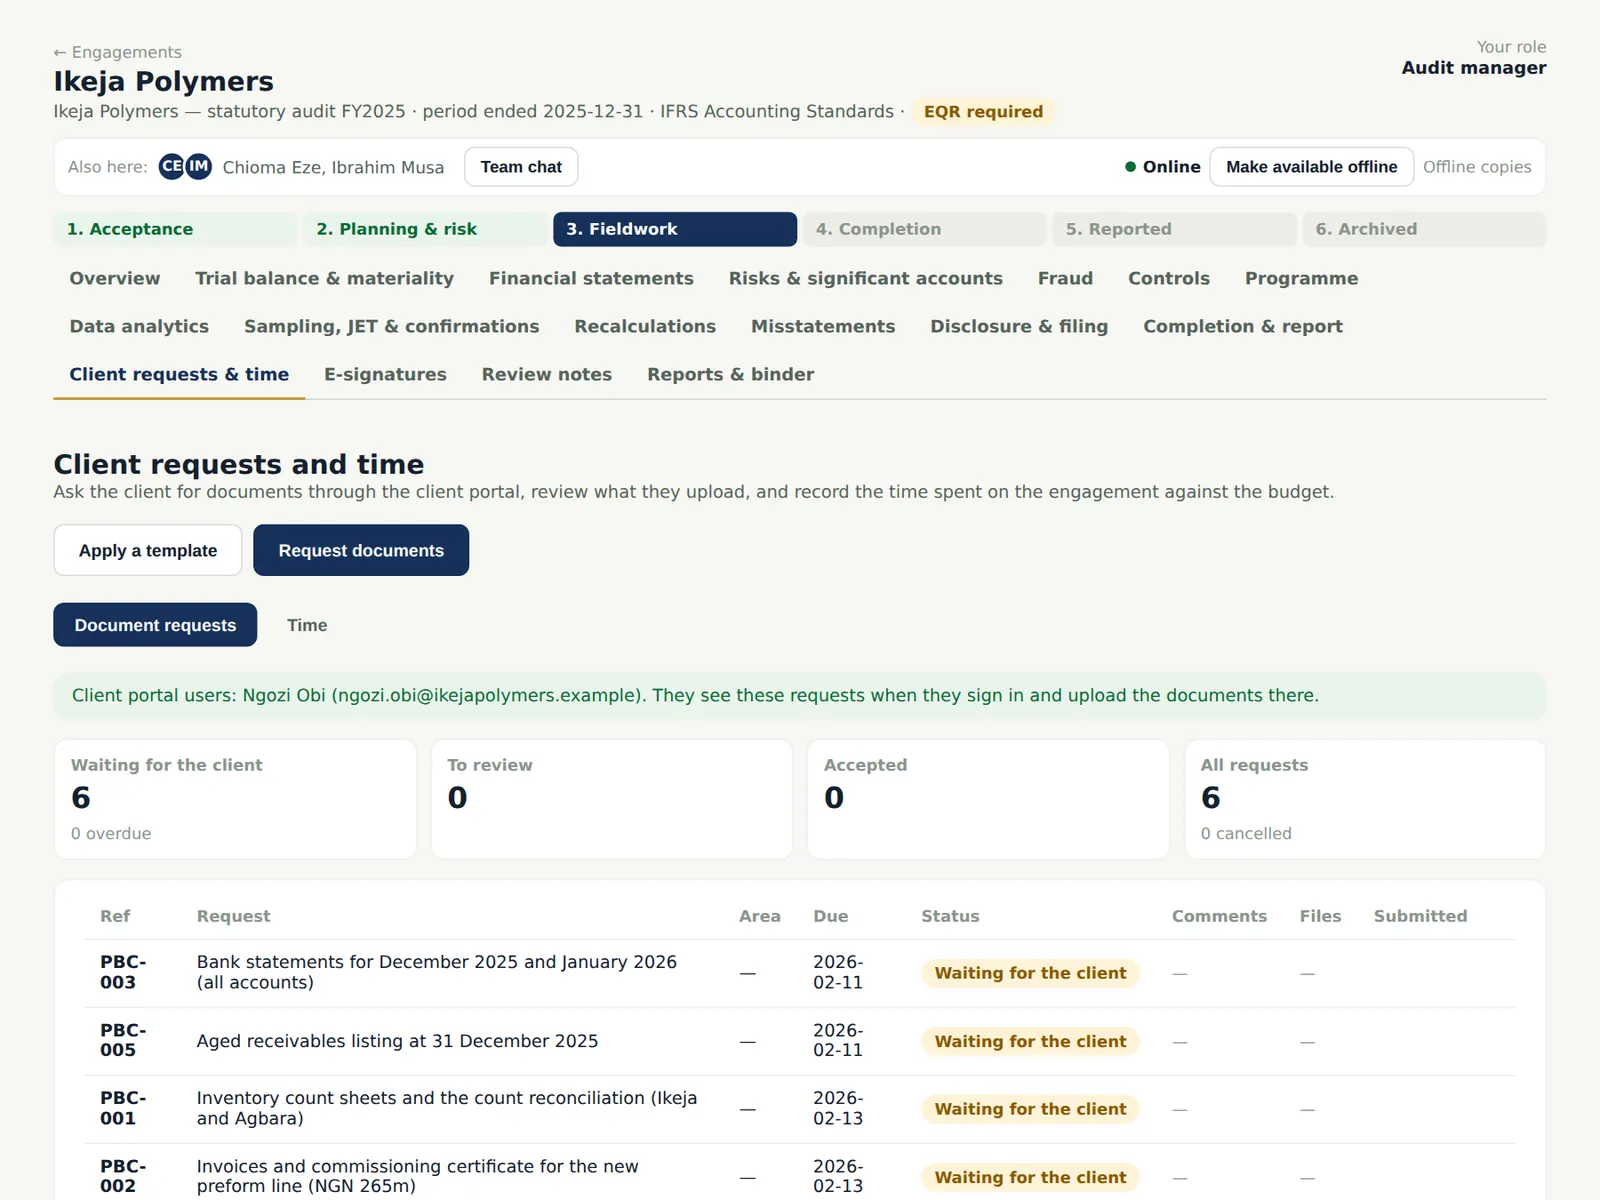
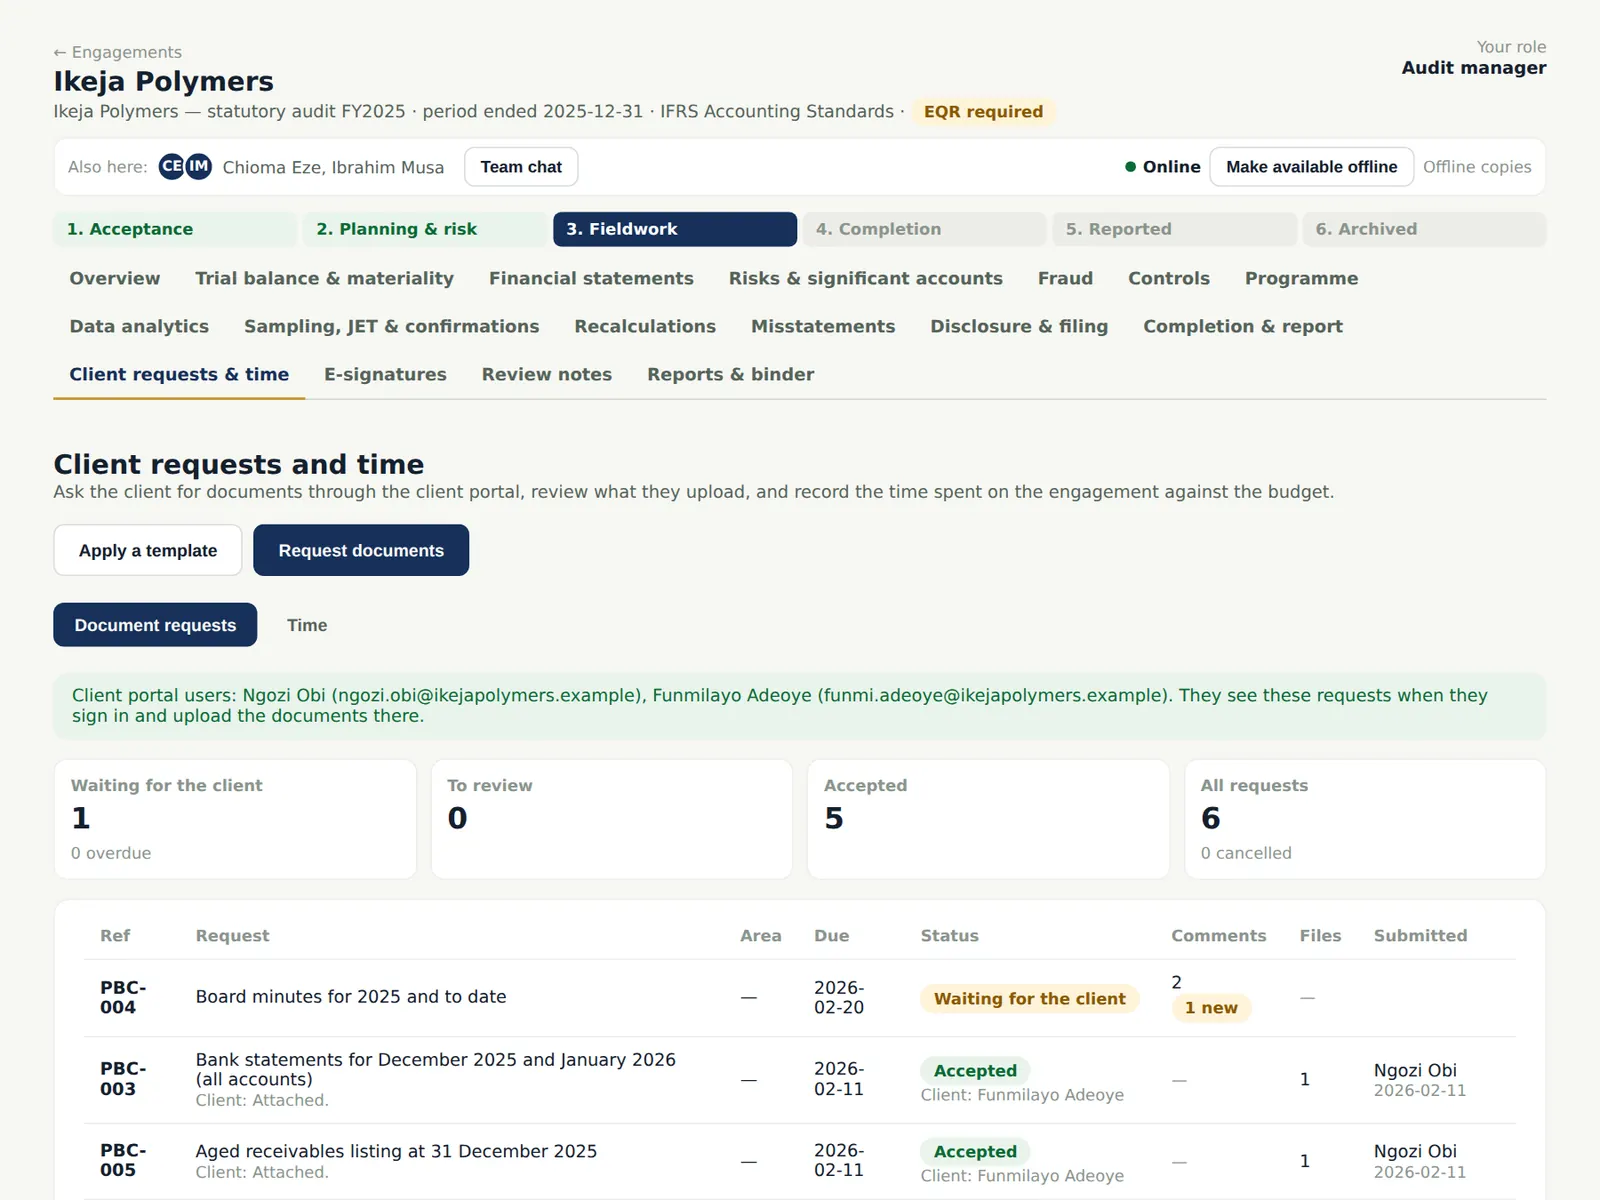
The list shows each request's status: waiting for the client, in progress, to review, returned with comments, accepted; and the comments and files on each.
Who
—
What to do
- Give the client's people portal access on the client's page (chapter 7).
11.4 The client's overview
Why
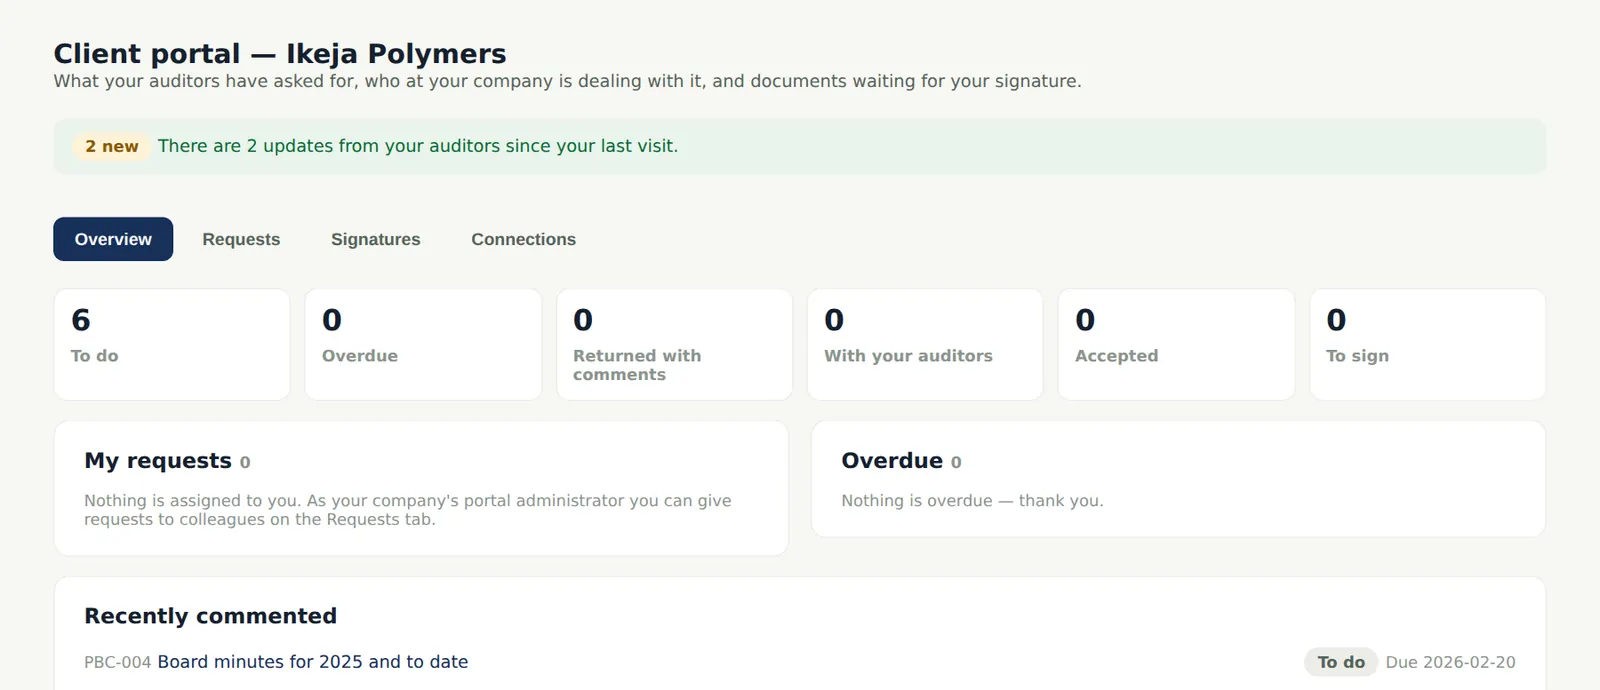
Client users see only their own company's requests — never working papers — with what is overdue and what was recently commented.
Who
Client user (Ngozi Obi, CFO).
What to do
- Open Requests to work through them.
11.5 Assign requests to colleagues
Why
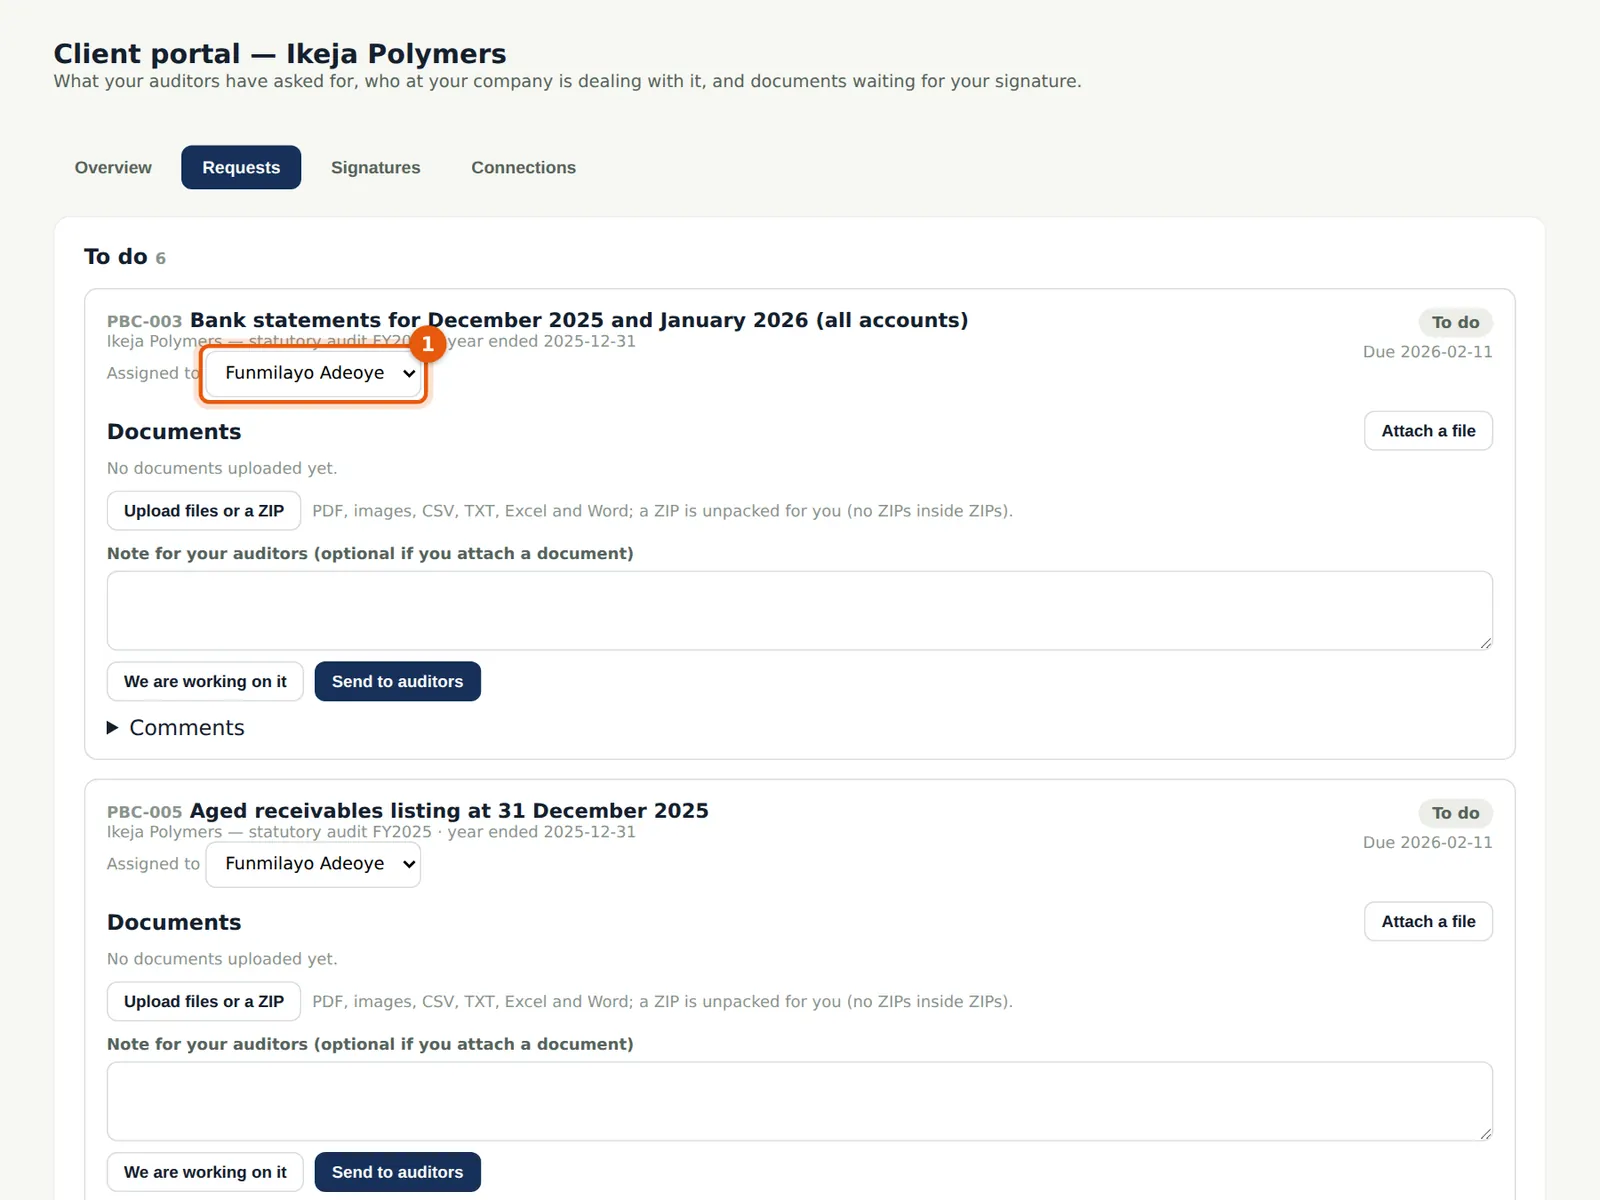
The client's portal administrator (the first portal user, unless the firm chooses otherwise) assigns each request to a colleague, who then sees it among their own requests. Here the CFO assigns the bank statements, aged receivables and fixed asset register to her financial accountant, Funmilayo Adeoye.
Who
The client's portal administrator.
What to do
- Choose the colleague in Assigned to (1); they are told.
11.6 Comments on a request
Why
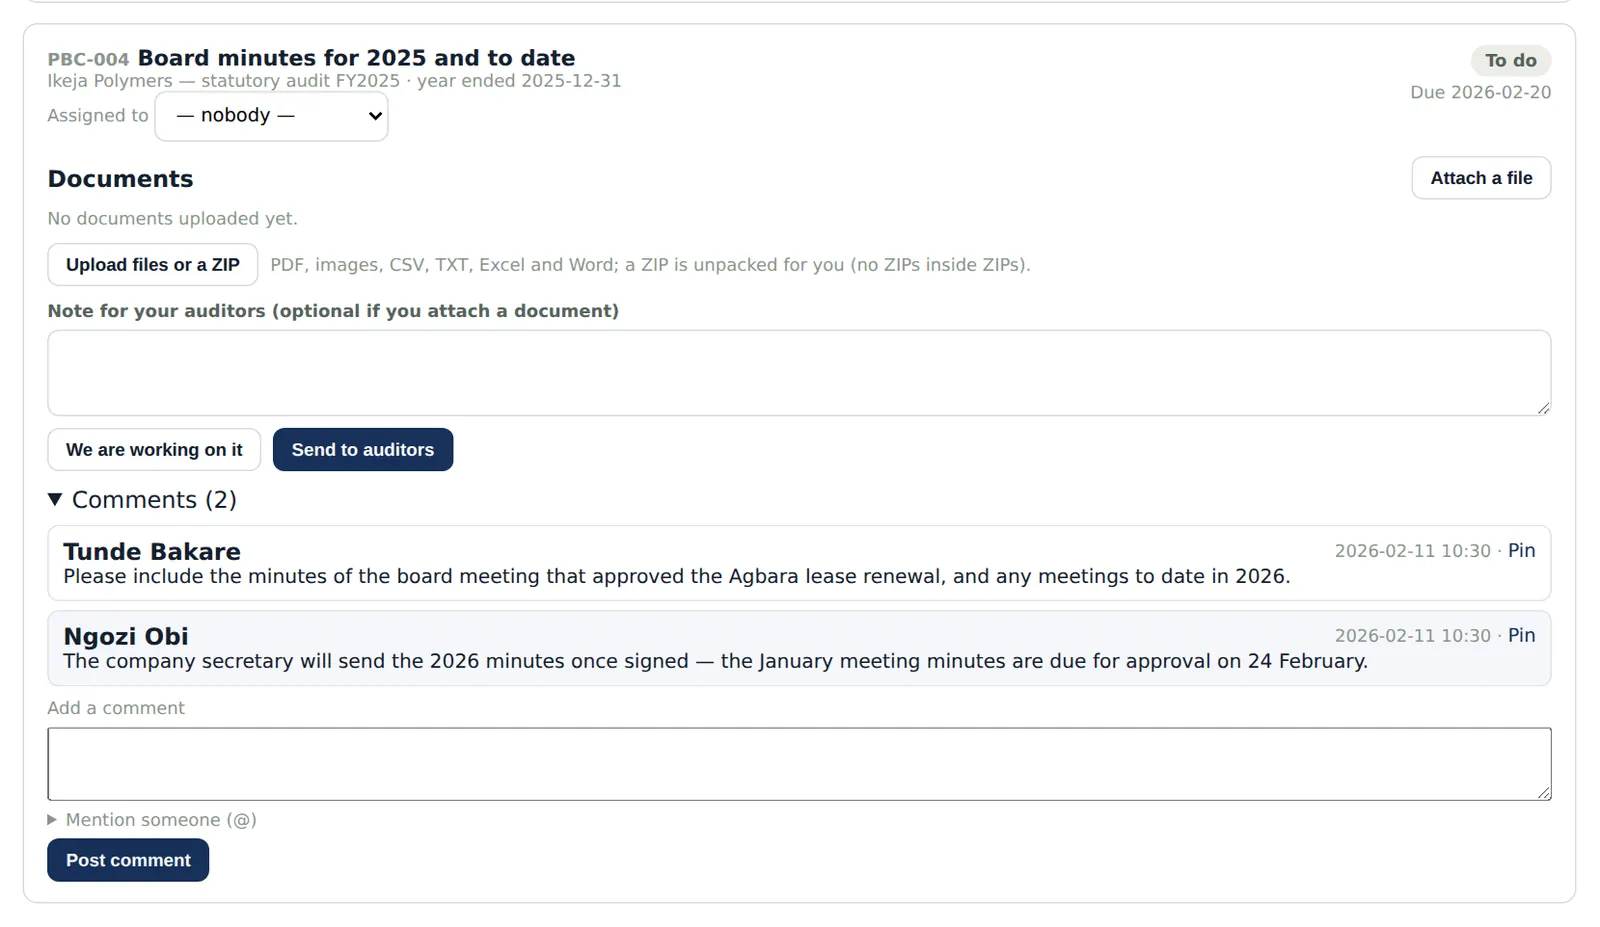
Both sides can comment on a request and mention people; unread comments are counted and a comment can be pinned. Comments are kept with the request in the file.
Who
Client users and the team.
What to do
- Open Comments on the request, type your comment (mention someone with @) and choose Post comment.
11.7 Upload and send
Why
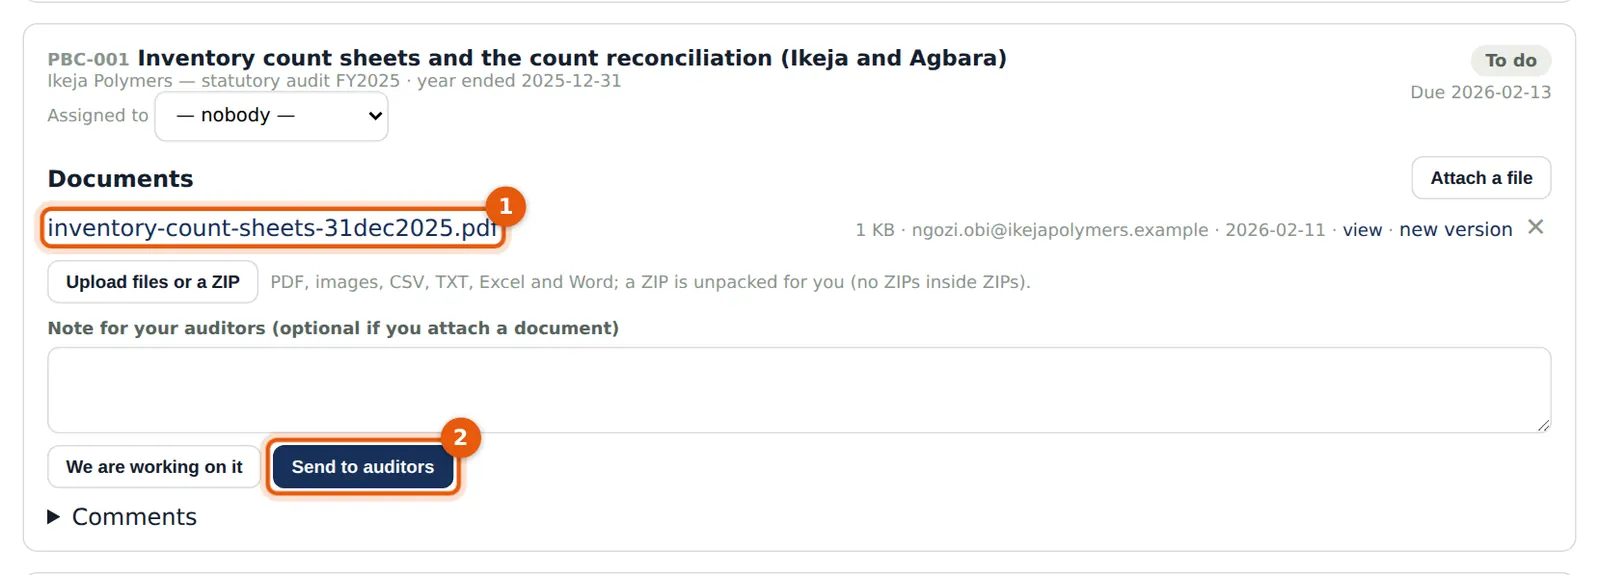
The client attaches the document and sends the request to the auditors; whoever asked is told at once.
Who
Client user.
What to do
- Choose Attach a file, add a note if it helps, and choose Send to auditors (2).
11.8 Upload several files as a ZIP
Why
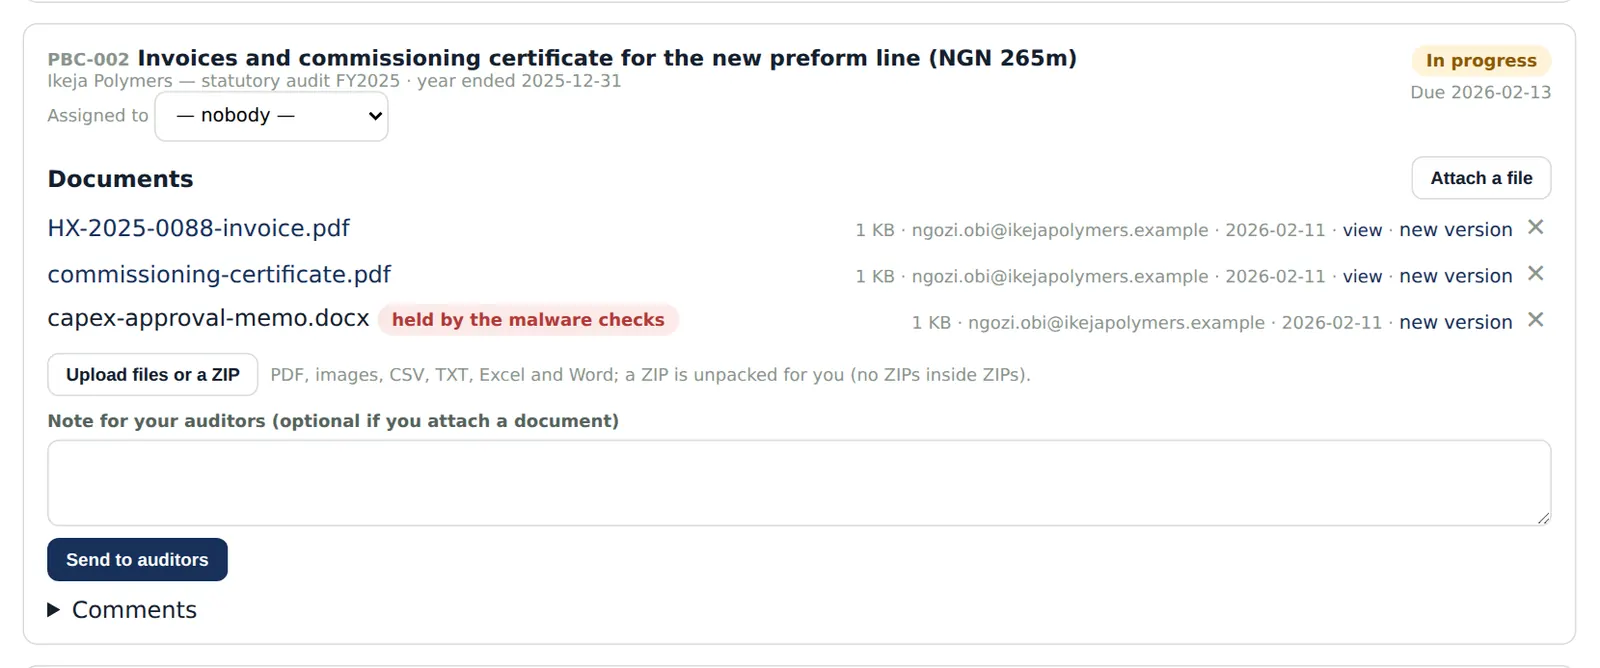
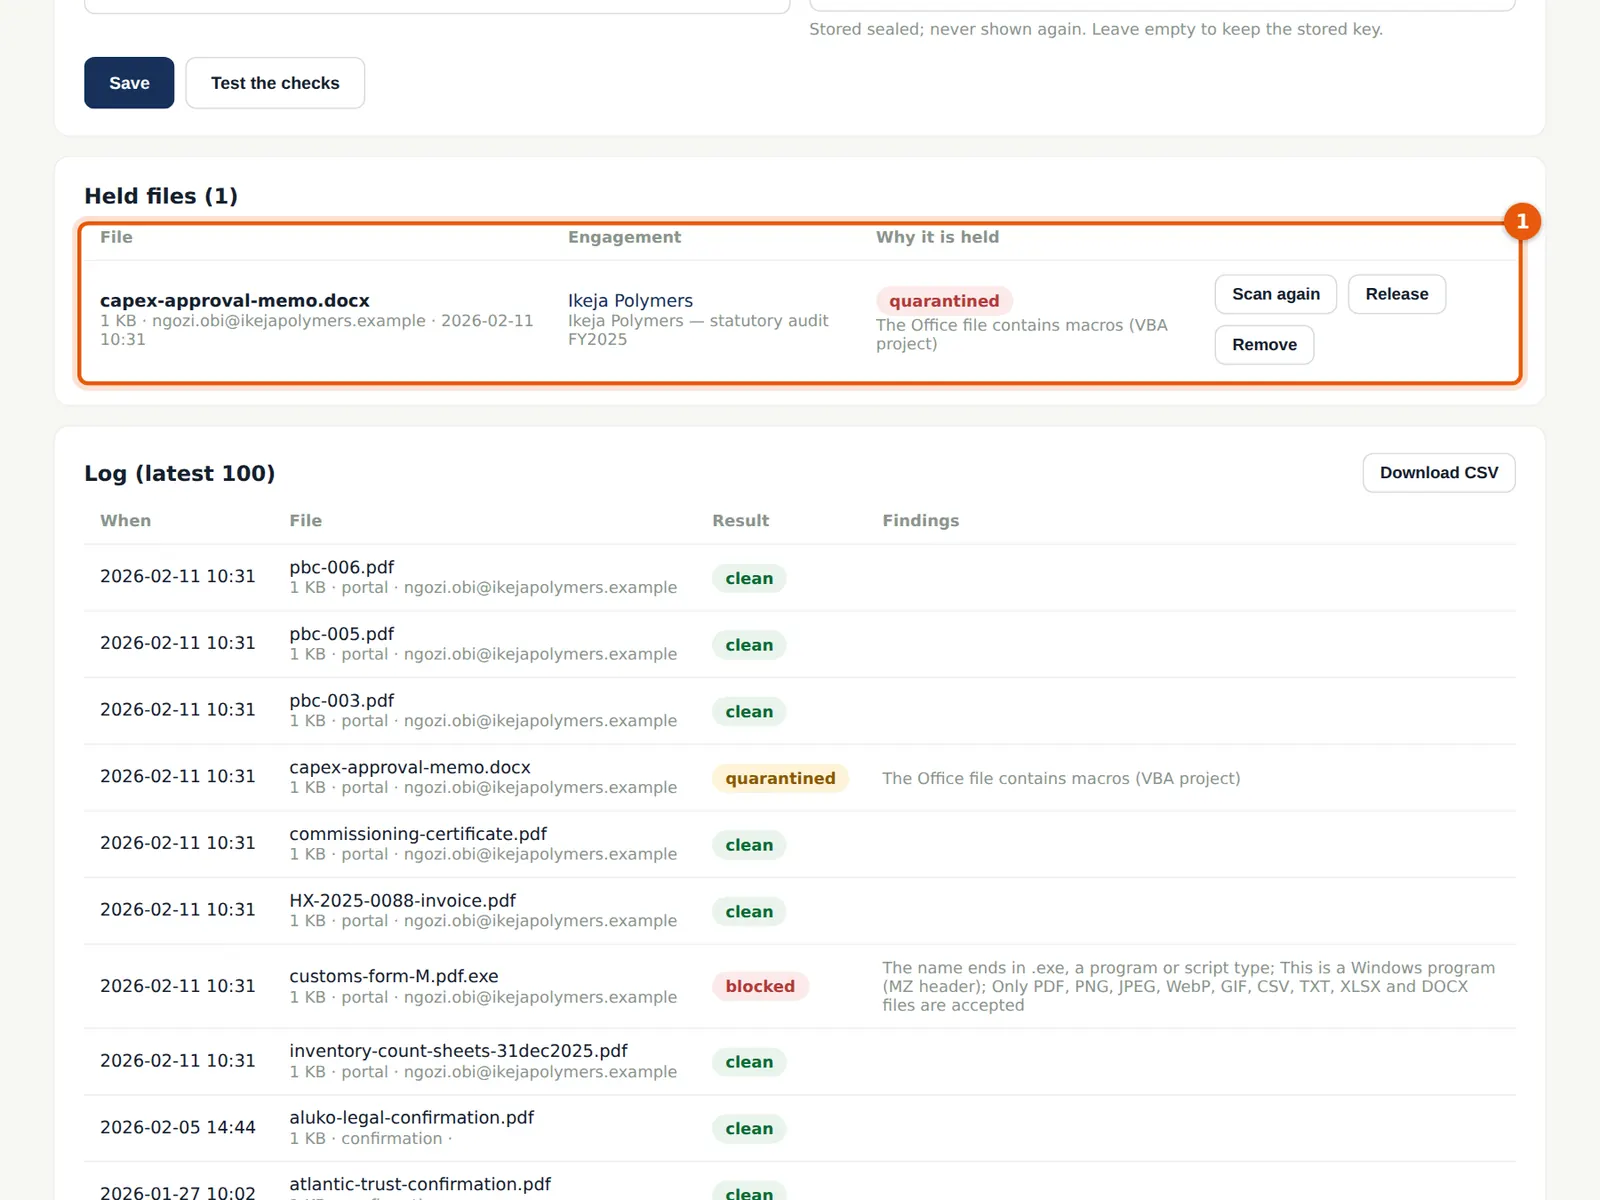
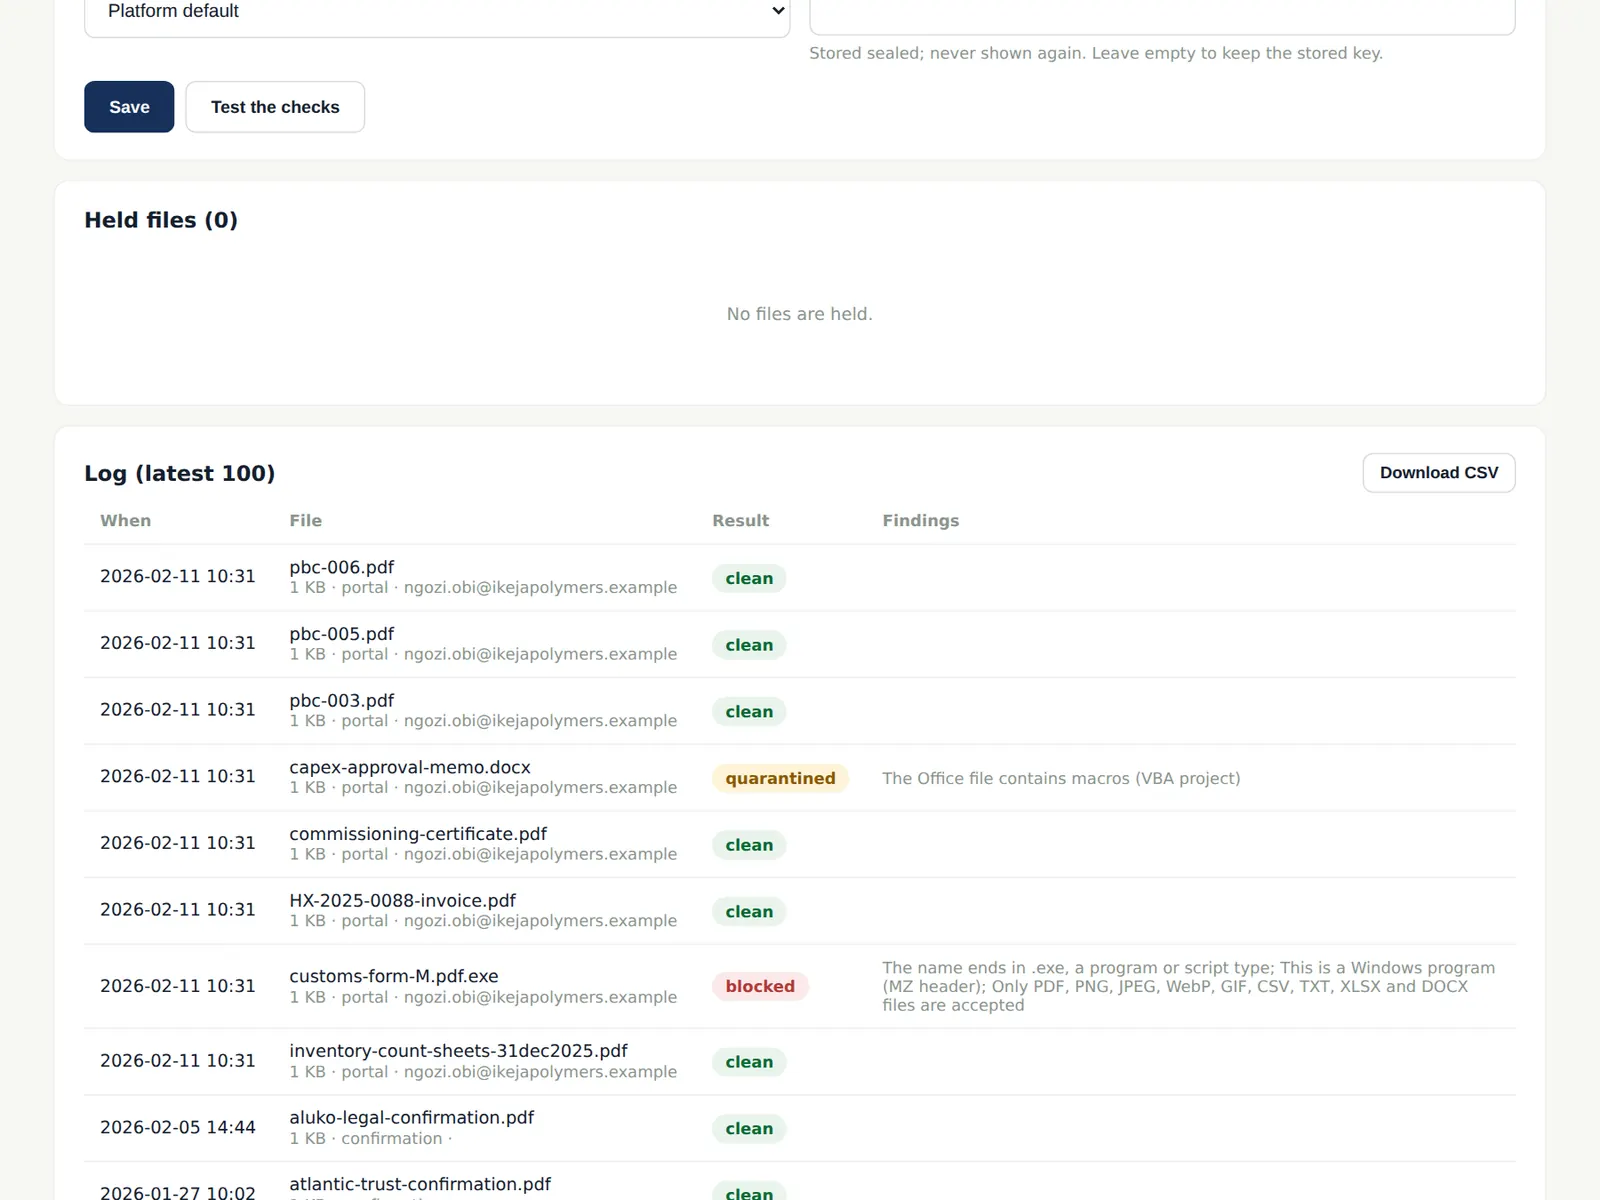
Upload files or a ZIP takes several files at once; a ZIP is unpacked on the server and every file inside is checked. Here the invoice and certificate were stored; customs-form-M.pdf.exe — a Windows program disguised as a PDF — was refused; capex-approval-memo.docx contains a macro and is held by the malware checks until an administrator looks at it.
Who
Client user.
What to do
- Choose Upload files or a ZIP and pick the files. Read the result: anything refused must be sent in an accepted format.
11.9 A held file
Why
Held files cannot be opened or downloaded by anyone until they are released. The firm administrator sees each one with who uploaded it, the engagement and why it is held.
Who
Firm administrator (Ifeoma Chukwu).
What to do
- Open Settings → File scanning. Check the file safely (for example with the client, or in an isolated viewer).
- Choose Scan again, Release or Remove.
11.10 Release a held file
Why
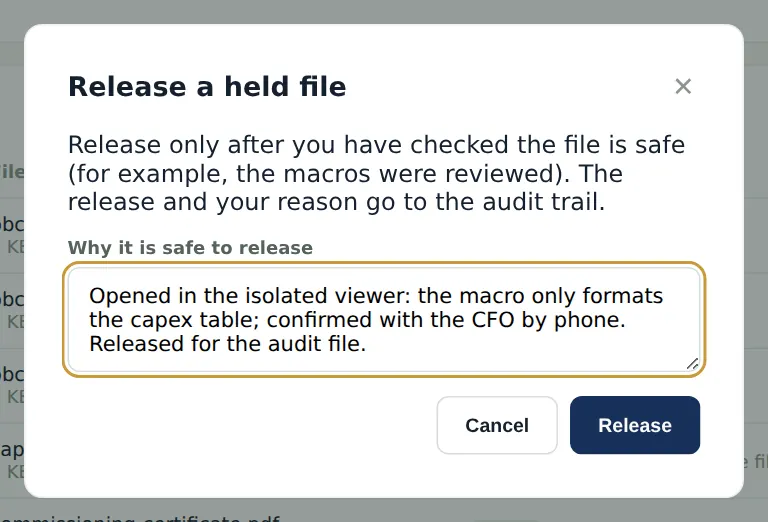
Releasing a file is recorded with the reason and who did it. Remove deletes it from the file instead.
Who
Firm administrator.
What to do
- Explain why the file is safe and choose Release.
11.11 The scanning log
Why
The log shows every file checked in the last period with its source (portal, confirmation, BookTrove, team), the result (clean, held, refused) and the findings; download it as CSV for the firm's security records.
Who
Owner or firm administrator.
What to do
- Choose Download CSV to keep a copy.
11.12 Accept what the client sent
Why
Review what the client sent. Accept it, or send it back with a note saying what is missing.
Who
Manager or senior.
What to do
- Open the request, check the documents and choose Accept or Send back.